
Now that you understand what Next.js is and why it's needed, let's see how to create a Next.Js app.
While a Next.Js app can be created manually, the easiest and recommended way is to use a
tool called create-next-app.
This tool sets up everything for you so you don't have to worry about manual configurations. Instead, you can start coding almost immediately!
Installation
Before you create your Next.Js app, let's make sure your device meets the system requirements. To be able to create a Next.js app using the latest version of Next.Js, you'll need:
- Node version 18.18 or newer
- Windows, Linux or MacOs operating System.
Let's Create your Next.JS app
- open your terminal and run the command (Ps: internet connection is required):
npx create-next-app@latestnpx comes with Node.js so no extra installation needed
- You would be asked the following questions to proceed with the installation:
What is your project named? #enter name of project without space
Would you like to use Typescript? (Yes/No) #yes
Would you like to use Eslint? (Yes/No) #yes
Would you like to use Tailwind CSS? (Yes/No) #yes
Would you like to use src/ directory? (Yes/No) #No
Would you like to use App Router? (Yes/No) #yes
Would you like to customize the default import alias(@/*)? (Yes/No) #yes-
As a React developer, there is a very high chance you already know what each prompt is refering to. If there's any prompt asked that you're not sure of, most likely that would be "Would you like to use App Router?"
Please choose "yes" for now, we'll talk about it later. so don't worry if it doesn't make sense now. -
These lessons use a little Typescript. if you're not familiar, don't worry i'll give quick explanations along the way- just click on the button to view the explanation.
Once the installation is complete:
cd [my-app-name]Replace [my-app-name] with the name of your project.
Finally:
npm run dev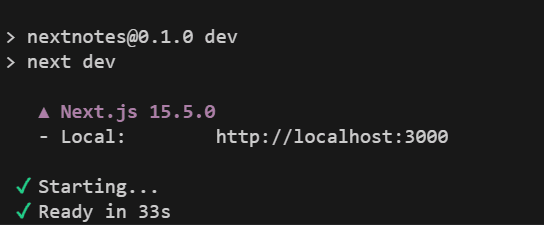 successfully started the development server for the Next.js project using the command 'npm run dev'
After starting the server, you can open your Next.js App on
http://localhost:3000/ (copy and paste the url in your browser)
After opening the url (http://localhost:3000/) on your browser, you should see the following output:
 The default page of a newly created Next.js 15 project
And that's it..
 Congratulations on creating your Next.js application
Summary
You've successfully created you Next.js app.
- You saw how the create-next-app tool guided you through the process
- You selected options like App Router and Typescript (don't worry if these are new, we'll talk about them later )
- You've successfully started your Next.js app locally
- Well done!
Think of this as building a house. You've set the foundation. From here, we can start shaping this into something amazing.
Next, let's understand the project structure of your just created Next.js app.